This right angle weave video tutorial is for those of you who are having a tough time with right angle weave (RAW). It’s also a quick overview of the stitch, if it’s been awhile since you’ve done it.
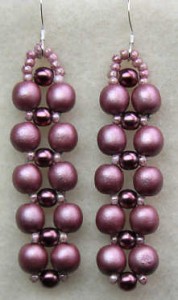
This video tutorial is also for anyone who wants to see what RAW can do, because I show some jewelry I made with right angle weave that I think looks pretty neat. :) And the pieces show the versatility of the stitch.
Here’s the video, along with some more tips and info on the jewelry just below the video.
OK, so now you’ve seen the video, and you’re wondering about 1) any tips fro RAW and 2) the ebook tutorial.
I’ll start in reverse order; click here for the link to the right angle weave ebook tutorial.
Next, here are some tips for working right angle weave. It’s really not a difficult stitch once that “ah-hah!” moment hits, but it is one of the more difficult beadweaving stitches for most people.
- Start with size 8 seed beads that are not super-shiny; the reflection off the surface can make it tough to see which bead you’re working. Matte beads are even better.
- If you have some beeswax or micro-crystalline wax, put some on your thread; the stickiness will help hold your beads in place, especially since you are working with larger-holed beads.
- Pick beads that have an even shape, but not Delicas (which aren’t the best for learning RAW). Toho seed beads are excellent to learn on.
- If you’re having problems with size 8 seed beads, try round 3mm or 4mm beads. Glass pearls or Czech druk beads are good, as they are large enough to see easily, but they have a smaller hole than the size 8s, so they stay in place a little better.
- Keep your tension as even as possible — snug but not tight is best.
- If you’re having trouble telling which beads are top and bottom, and which are the sides, alternate your colors. In other words, instead of stringing on four turquoise beads, start with 1 turquoise, 1 white, 1 turquoise, 1 white. Then keep alternating the colors, and it will be easier to tell the tops and bottoms from the sides.
- Don’t get discouraged! When I was learning, the straight line part was relatively easy, but the step up drove me crazy. Finally one day I decided to sit at the table and not quit until I had mastered the step up. I was there at the table like 2 hours. Of course back then all that was available was written directions; I probably would have gotten it sooner if I had a video to watch.
So I hope this helps you to learn right angle weave. It’s definitely worth adding to your beadweaving patterns because it really is versatile — not to mention fun!